
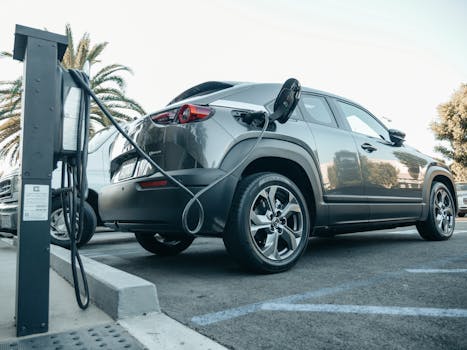
Installing an electric vehicle (EV) charger at home or your business is a straightforward project when handled by a qualified electrician. The process typically takes two to three hours for a straightforward installation, but the total time depends on your property’s electrical setup, panel capacity, and whether permits are required. Understanding each step helps you prepare and ensures a safe, reliable installation that meets current electrical codes.
Understanding Your Electrical Setup
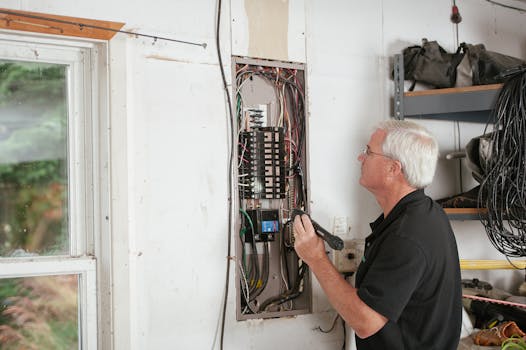
Before any installation begins, a licensed electrician must evaluate your property’s electrical system. Two key factors determine whether your existing setup can support a Level 2 charger: the service panel amperage and the type of connection used.
Service Panel Capacity
Most homes built in recent decades have 200-amp service, which usually provides enough capacity to add a dedicated 240-volt circuit for an EV charger. Older homes with 100-amp service may struggle to accommodate the additional load. In such cases, an electrician can install a load management system, which costs around $1,200, to balance power usage. Alternatively, upgrading the entire service to 200 amps is an option that typically costs $3,000 or more. A professional assessment is essential to determine the best solution for your property.
Hardwired vs. 240-Volt Outlet
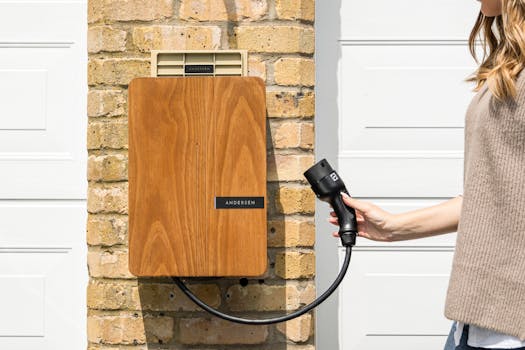
There are two main installation options: hardwiring the charger directly into the electrical system, or installing a 240-volt outlet that allows you to plug in a portable EVSE. Hardwiring provides a cleaner, permanent connection and is required for chargers rated over 60 amps. Installing a 240-volt outlet offers flexibility if you want to use the same outlet for different chargers or a portable unit. Both require a dedicated circuit, and the choice often comes down to convenience and the specific charger model.
The Installation Process Step by Step
A qualified electrician follows a systematic process to ensure your EV charger is installed safely and functions correctly. While the exact steps vary by property, the general workflow includes site evaluation, load calculation, permitting, wiring, mounting, and testing.
Site Evaluation and Load Calculation
The electrician first inspects your electrical panel to confirm its amperage and available breaker slots. They calculate the existing load from your home or business and determine whether the panel can handle the additional 240-volt circuit. If the panel is near capacity, they may recommend a load management device or a service upgrade. The location of the charger is also assessed – the distance from the panel to the charging station affects the amount of conduit and wiring needed.
Permits and Approvals
Most jurisdictions require a permit for EV charger installation. Permit fees typically range from $50 to $300, and the electrician will handle the application process. Requirements vary by local code, so it is important to work with an electrician who is familiar with regulations in your area. The electrician will also schedule any required inspections after the work is complete.
Running Conduit and Wiring
Once the permit is secured, the electrician runs conduit from the service panel to the charger location. This may involve routing cable through walls, ceilings, or underground if the panel is on the opposite side of the building. For a standard installation, up to 15 meters (roughly 49 feet) of cable between the panel and chargepoint is typically included. The electrician installs a dedicated 240-volt breaker in the panel and, for stations over 60 amps, an emergency disconnect switch is required.
Mounting and Connecting the Charger
The charger unit is securely mounted on a wall or pedestal. If using a hardwired connection, the electrician connects the charger directly to the circuit wiring. If installing a 240-volt outlet, a NEMA-rated receptacle is installed. The electrician will also attach any tethered cable if the charger comes with one, or note that an untethered unit requires the user to supply their own cable.
Testing and Configuration
After all connections are made, the electrician powers on the system and tests the charger to ensure it is delivering the correct voltage and amperage. Wi-Fi configuration may be set up at this stage to allow you to monitor charging through an app. A final test confirms the charger communicates with the vehicle and works as intended. The electrician will also review safety precautions and operation with you before leaving.
Cost and Incentives
The cost of EV charger installation varies widely based on your home’s electrical system, the charger model, and local labor rates. Understanding the typical ranges and available incentives helps you budget for the project.
Federal Tax Credit
The federal government offers a tax credit covering 30% of installation costs, up to $1,000. This applies to both the charger purchase and the electrical work, provided the installation meets program requirements. For an accurate quote tailored to your property, contact Bauer Electric.
When Upgrades Are Needed
If your electrical panel cannot support the new circuit, additional costs can arise. Load management systems run about $1,200, while upgrading to 200-amp service can exceed $3,000. These upgrades are not always necessary – a licensed electrician can evaluate your existing system and recommend the most cost-effective path. Always obtain a written estimate before beginning work.
Frequently Asked Questions
How long does EV charger installation take?
A straightforward installation typically takes 2 to 3 hours. This estimate covers wiring, mounting, and testing. Projects that require running long cable distances, upgrading the electrical panel, or obtaining special permits may take longer. Your electrician can provide a time estimate after assessing your property.
Do I need a permit for an EV charger?
Most local jurisdictions require an electrical permit for adding a new 240-volt circuit. Permit fees range from $50 to $300. Your electrician will handle the permit application and any required inspections. Skipping permits can lead to safety issues and problems when selling your home.
Can I install an EV charger myself?
EV charger installation involves high-voltage electrical work and requires knowledge of local codes. It is strongly recommended to hire a licensed electrician. A professional ensures the circuit is properly sized, grounding is correct, and all connections meet safety standards. Many warranties also require professional installation.
What is the difference between hardwired and plug-in chargers?
A hardwired charger is connected directly to the electrical system, offering a permanent and often sleeker installation. A plug-in charger uses a 240-volt outlet, allowing you to disconnect and move the unit if needed. Both require a dedicated circuit. Hardwiring is typically used for higher-amperage chargers, while plug-in models offer greater flexibility.
Contact Bauer Electric for a detailed consultation and quote tailored to your home or business. With decades of experience serving New Jersey and Pennsylvania, their team can guide you through every step of the EV charger installation process.